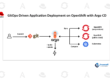
5 stages – provisioning DevOps using Helm on OpenShift from zero to hero
Here we are going to learn the 5 stages of provisioning DevOps using Helm on OpenShift from Zero to hero. Let’s look at how to use the Cloud Native Pipeline to provision a comprehensive DevOps environment while following best practices and utilizing the Helm package manager for Kubernetes. We’ll show you how to implement this approach with a real application using a successful git branching model, also known as git-flow, after applying just 5 easy steps to create our DevOps setup with helm commands.
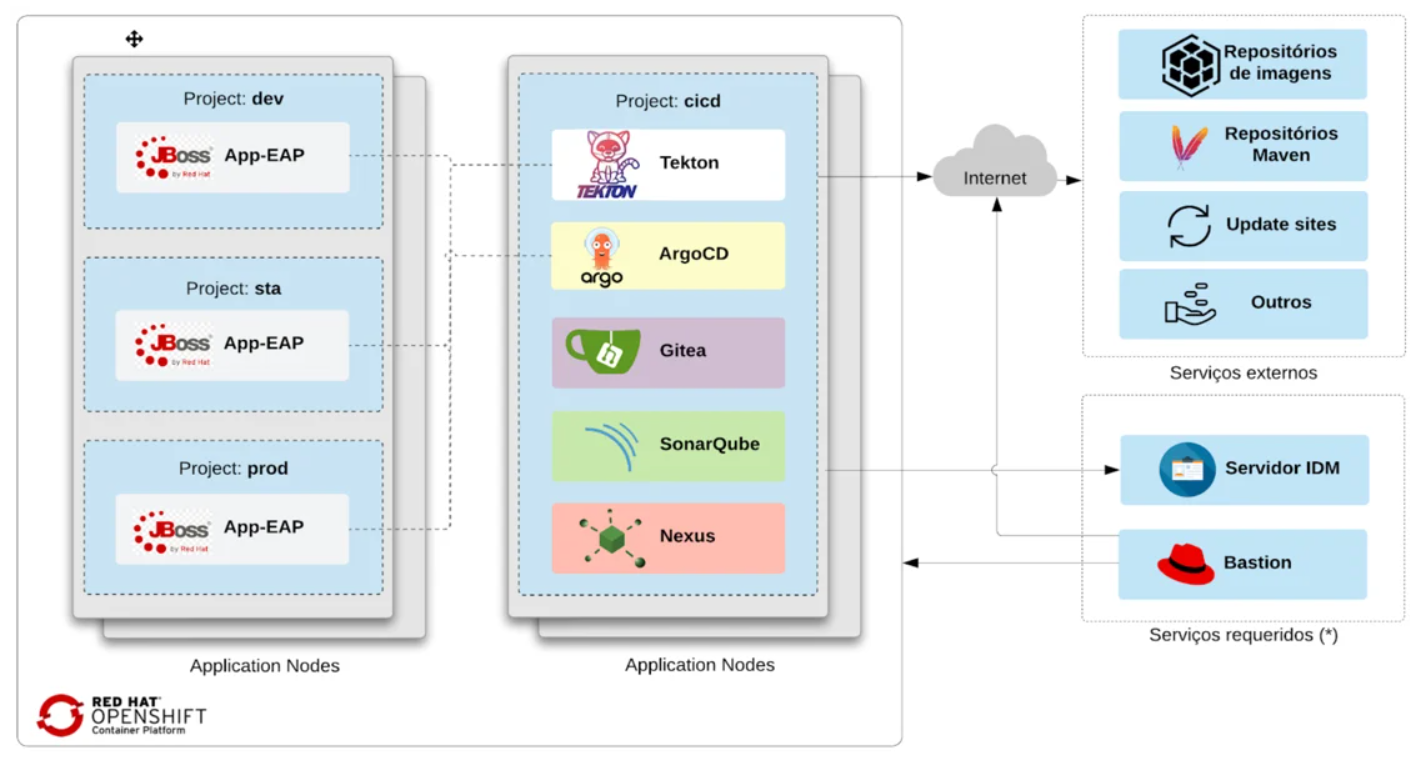
This solution will provide:
- Four namespaces: development, staging, and production (app environments), each with one to cicd (infra tools).
- Each git commit uses OpenShift Pipelines (Tekton) to produce the app image.
- Delivering the application in an OpenShift cluster using OpenShift GitOps (ArgoCD)
- Gitea git server (gitea/DevOps as user/password)
- Sonatype Nexus (login: admin; password: admin123)
- SonarQube (login: admin; password: admin)
- You must modify this solution to fit your needs because it isn’t suitable for all use circumstances. The essay does not cover topics like tag or versioning strategy, adding programs with separate workspaces, hiding secrets, etc.
Prerequisites:
- User cluster administrator and OpenShift Platform 4.10+
- Tekton’s OpenShift Pipelines
- ArgoCD OpenShift Gitops
- Git client
- Helm client
- OpenShift oc client
Steps
The process for setting up the DevOps environment with Helm is then presented.
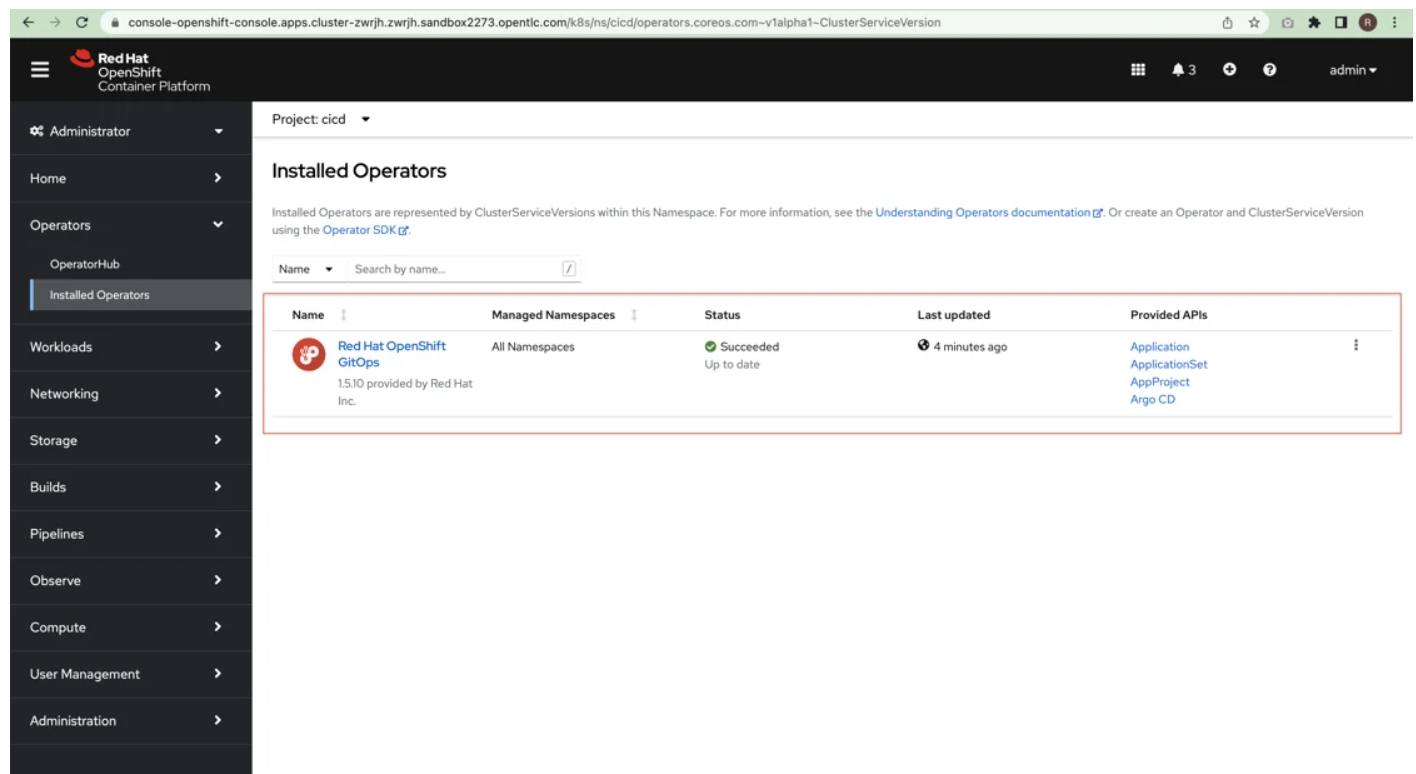
1. Installing OpenShift GitOps
Let’s begin setting up ArgoCD for OpenShift GitOps under the cicd namespace. The commands listed below should be used to add the redhat-cop helm charts repository.
# add the redhat-cop repository
helm repo add redhat-cop https://redhat-cop.github.io/helm-charts
# having added redhat-cop helm repository
helm upgrade --install argocd redhat-cop/gitops-operator --set namespaces[0]=cicd --create-namespace --namespace cicd
Verify that OpenShift GitOps Operator was installed properly.
2. Installing SonarQube
Install SonarQube by running the command below.
helm upgrade --install sonar redhat-cop/sonarqube -n cicd
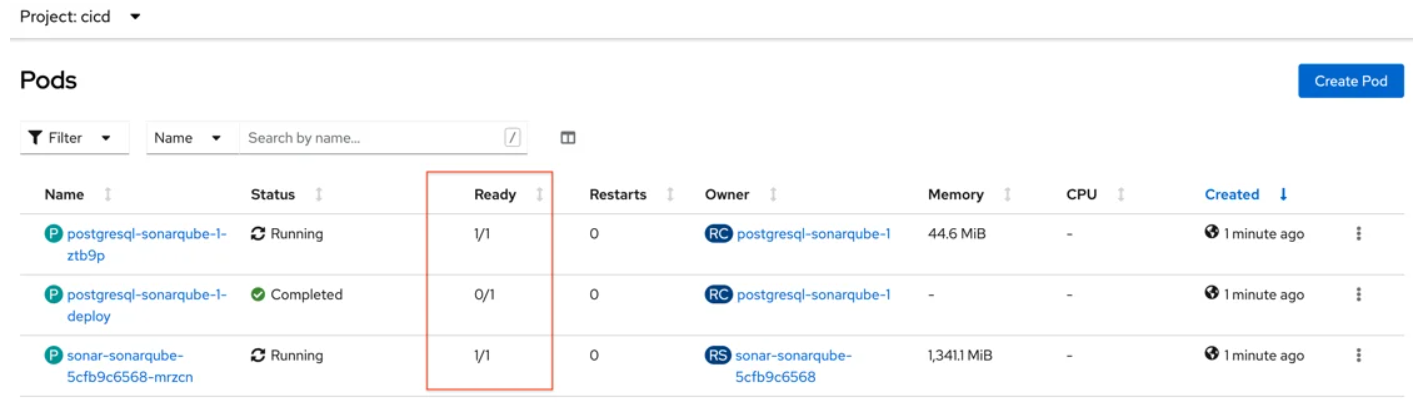
Verify that SonarQube is traversing the Ready column, where the value ought to be 1/1.
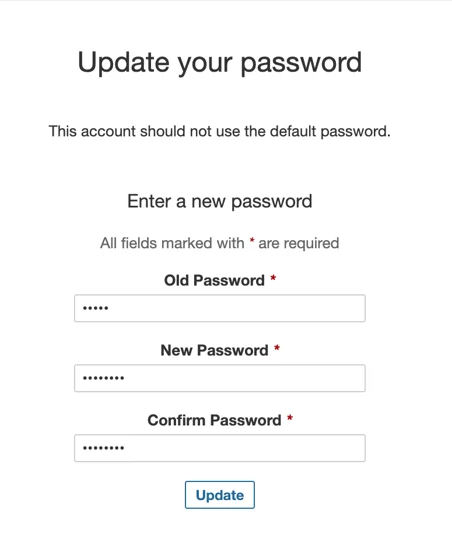
Sonarqube’s password should be changed from admin/admin to admin/admin123.
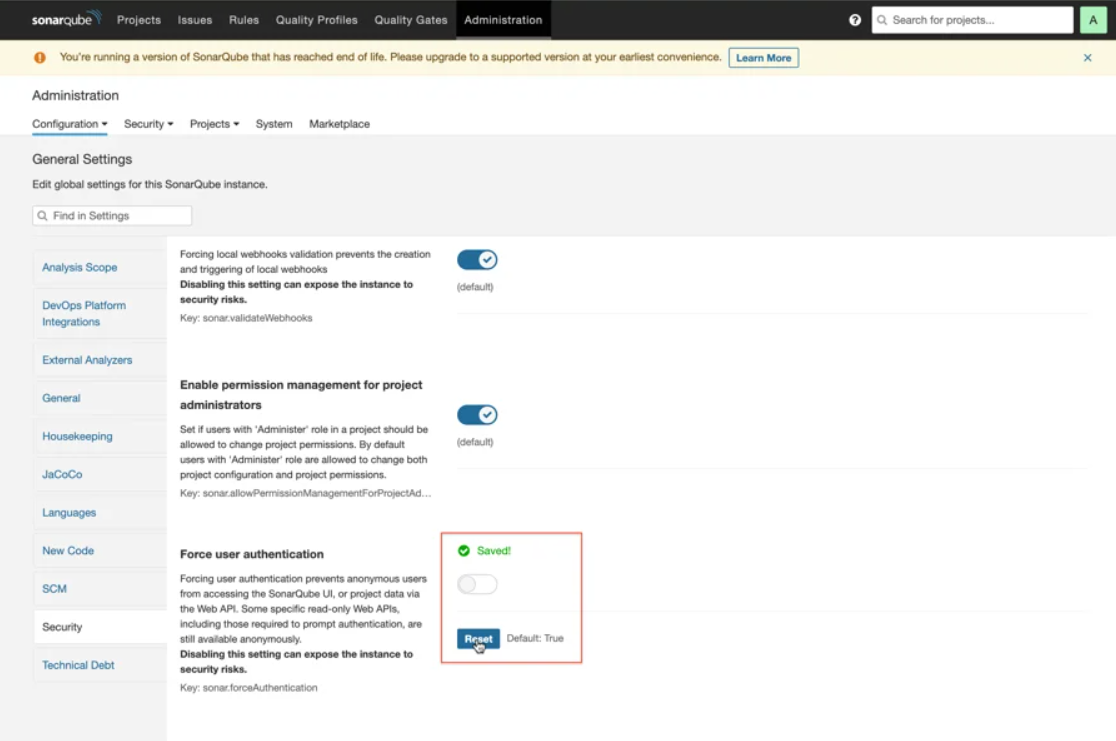
Sonar should be adjusted for unauthenticated access. As seen in the figure below, uncheck the box under Administration / Security / Force user authentication.
3. Installing Nexus
For the Nexus Sonatype to be installed, run the command below.
helm upgrade --install nexus redhat-cop/sonatype-nexus -n cicd
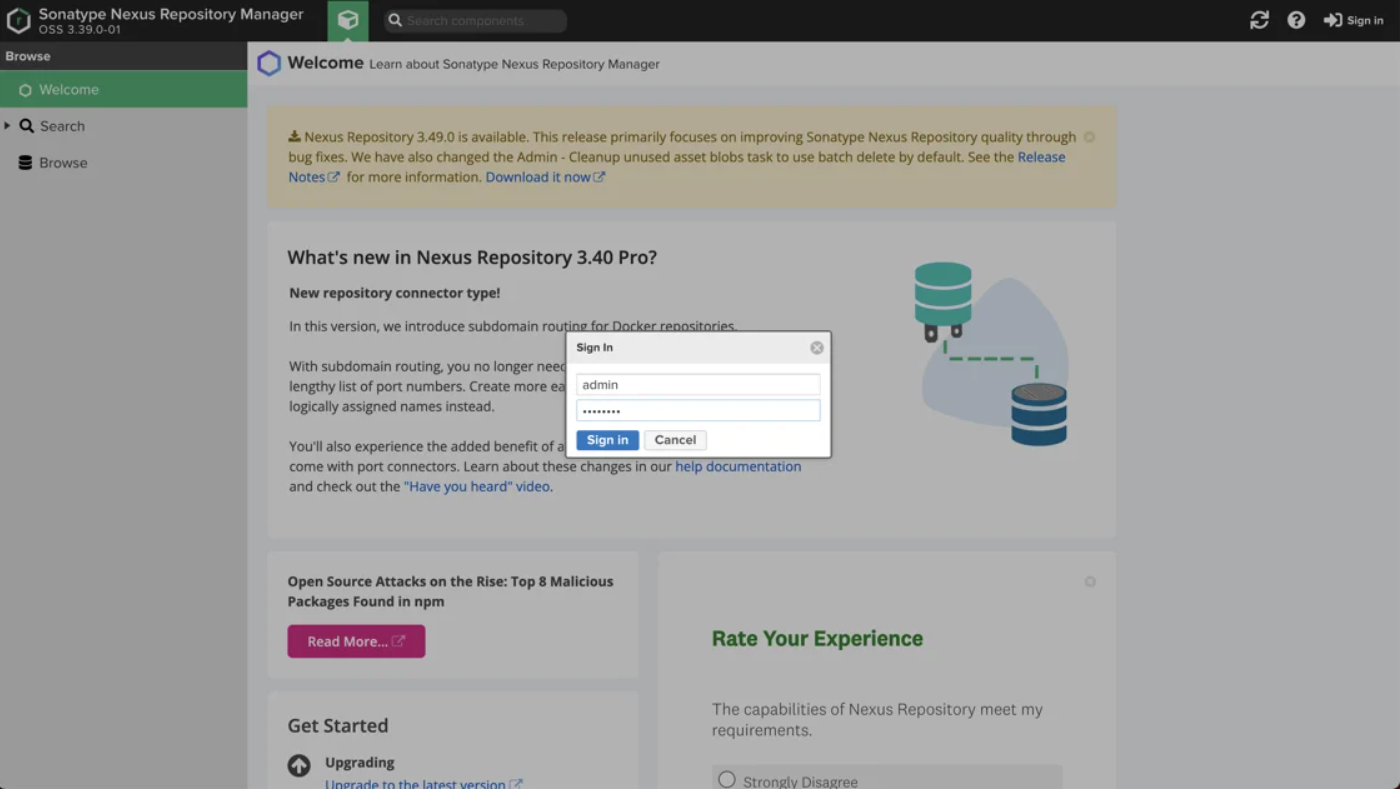
Access the application or the Ready column to see if Nexus is functioning properly. Administrator/admin123 is the default user and password.
4. Installing Gitea
To install a gitea server in this phase, we must first define the “cluster” variable with the domain portion of our cluster. In the following phase, this variable will be utilized to build the gitea server route.
As an example, the “cluster” variable in my cluster was defined as follows: https://console-openshift-console.apps.cluster-mqh7n.mqh7n.sandbox2145.opentlc.com. Considering how crucial this is, change your cluster variable.
Run the command to install the gitea server once more.
cluster=apps.cluster-mqh7n.mqh7n.sandbox2145.opentlc.com
helm upgrade --install --repo=https://redhat-cop.github.io/helm-charts gitea gitea --set db.password=openshift --set hostname=gitea-cicd.$cluster -n cicd
Check to see if Gitea is running after a short delay.
5. Installing OpenShift pipeline and so on
To install the OpenShift Pipeline – Tekton, do the following commands.
oc project cicd
git clone https://github.com/ricardoaraujo75/devops-ocp-helm.git
oc apply -f devops-ocp-helm/templates/operator-pipeline/openshift-pipelines-sub.yaml
Wait for the installation of the OpenShift Pipeline Operator to be completed under Operators / Installed Operators.
The moment has come for all of our DevOps strategies, including building namespaces, pipelines, tasks, triggers, and pvc as well as populating gitea repositories, webhooks, and Argocd apps. The last instructions implement the policy, enabling the pipeline to control the namespaces for resource creation.
helm --set pipeline.gitea.host=gitea-cicd.$cluster --set cluster=$cluster template -f devops-ocp-helm/values.yaml devops-ocp-helm  | oc apply -f-
oc policy add-role-to-user edit system:serviceaccount:cicd:pipeline -n dev
oc policy add-role-to-user edit system:serviceaccount:cicd:pipeline -n sta
oc policy add-role-to-user edit system:serviceaccount:cicd:pipeline -n prod
Verify the accurate creation of the Operator Pipeline, namespaces, pipeline object, tasks, triggers, pvc, webhooks, and Argocd app.
Ready!
Congratulations! By following the five steps above and utilizing the helm commands, you have successfully generated a complete DevOps environment for Cloud Native Pipeline on OpenShift. The proposal should now resemble the following image.
Let’s run the pipeline right now to make sure everything is working properly.
Let’s discuss the role of the CI and CD before we begin. The CI/CD article has more details.
Continuous Integration – CI
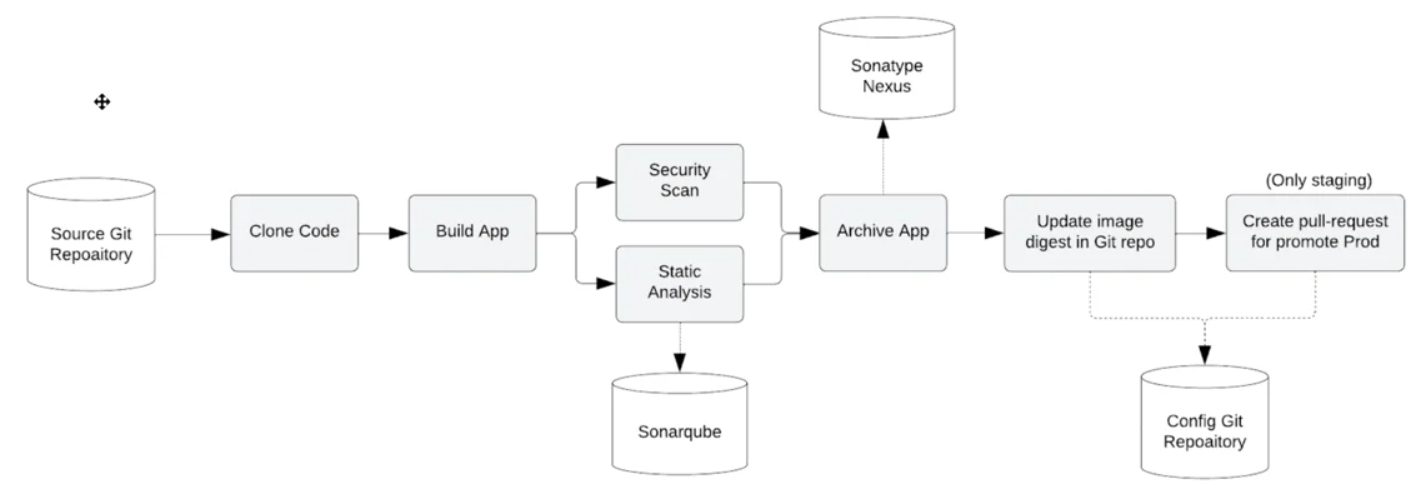
The following activities are carried out in the Pipeline on each push to the devops-ocp-app git repository on the Gitea server:
- The pipeline is started by the webhook set in gitea;
- The build is carried out when the code has been copied from the Gitea server;
- It is possible to run unit tests while SonarQube analyses the code in parallel for anti-patterns and generates a dependency report;
- The programme is released to the Sonatype Nexus artefact repository packed as a WAR;
- Depending on the branch, a container image is produced in the DEV or STA environment, published to the internal OpenShift registry, and tagged with app-eap:latest;
- The image digest produced by the pipeline is used to update the Kubernetes manifests in the Git configuration repository;
- To incorporate the image summary update into the PROD environment, a pull-request is issued in the configuration repository. This action is only taken for the STA environment.
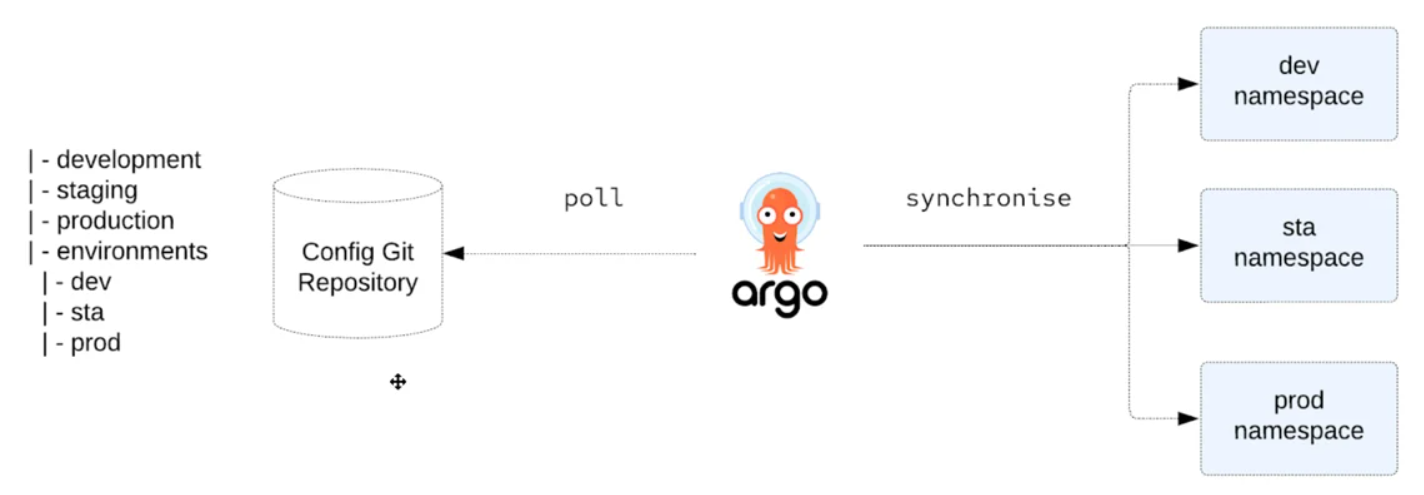
Continuous Delivered – CD
When deploying the application to DEV, STA, and PROD environments, Argo CD employs Kustomize to override environment-specific settings while continuously monitoring settings maintained in the Git repository.
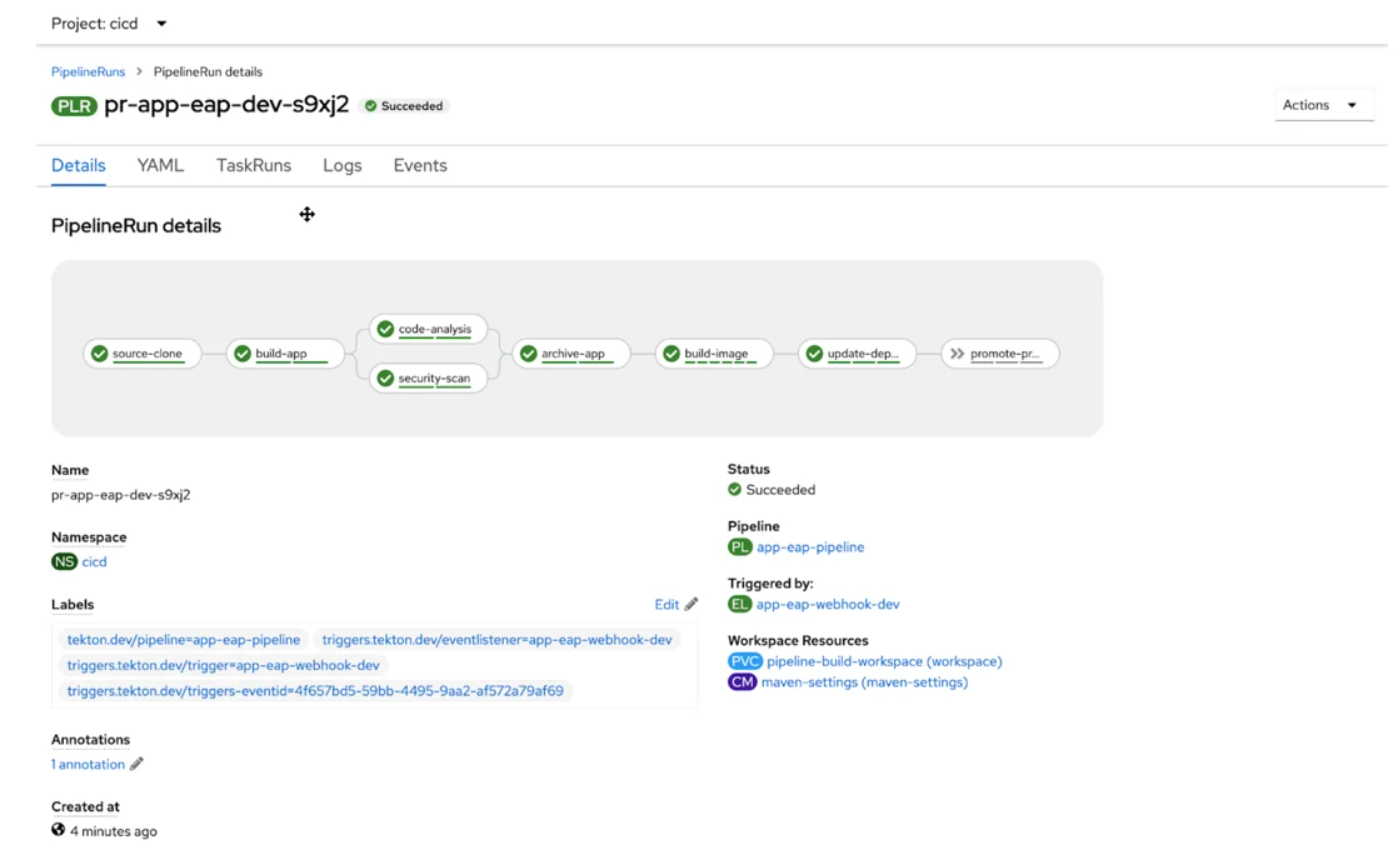
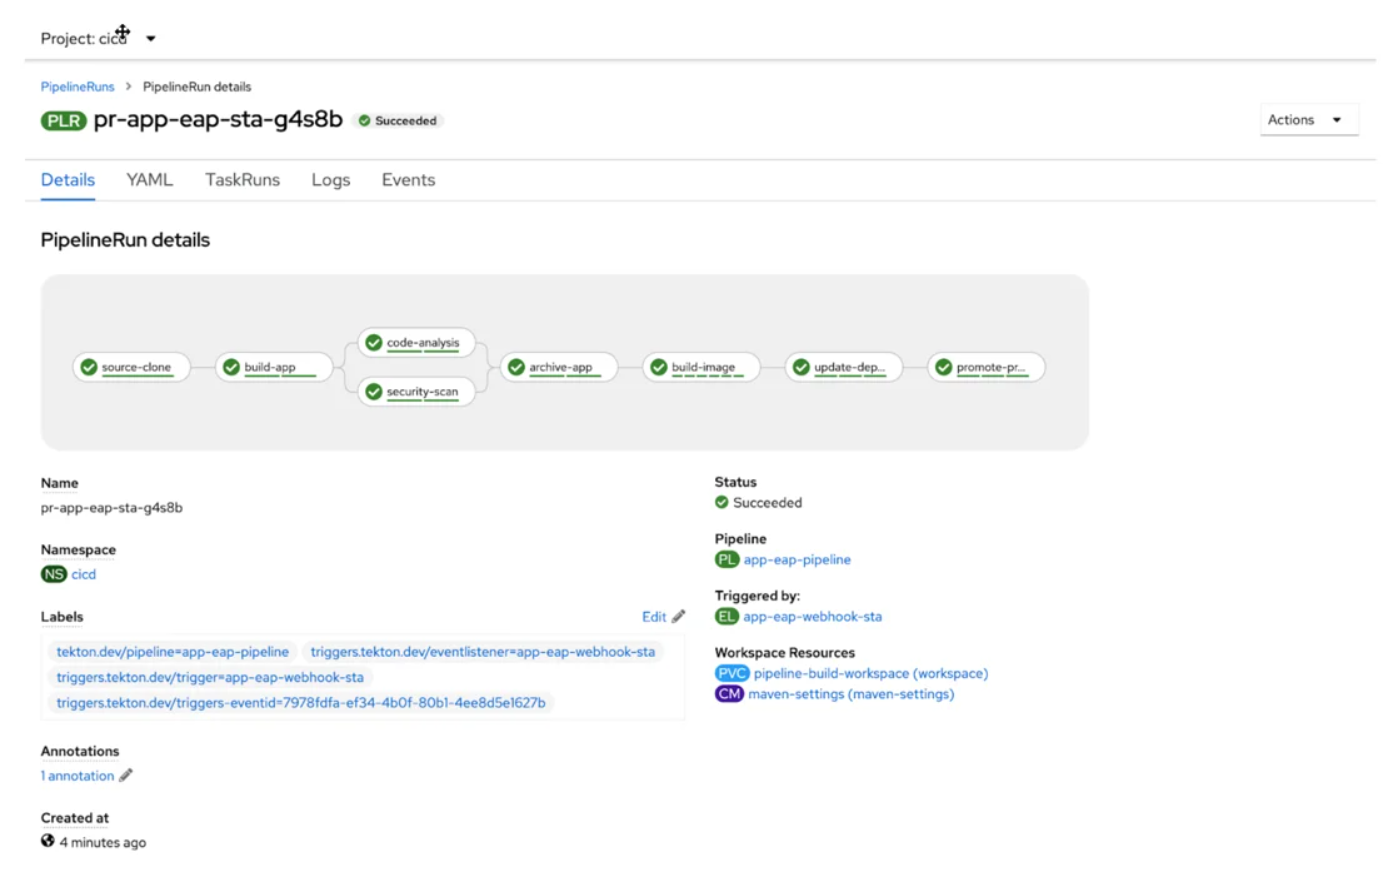
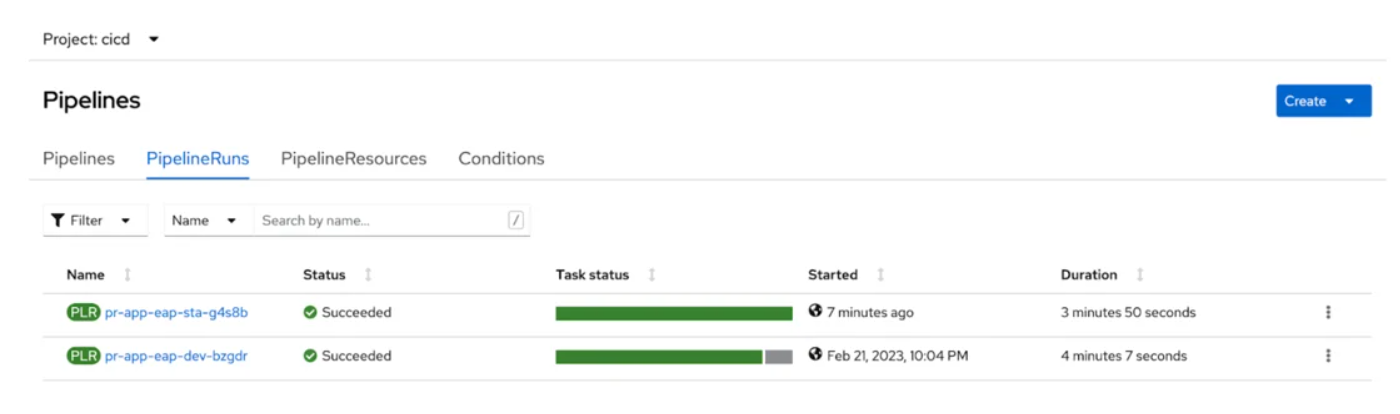
Pipeline execution
The goal is to construct a pipeline that will deploy the application in the development and staging environments. For production, a manual approval will be required, and it will be made available by a pull request in the GitOps configuration repository.
It includes the essential steps of a continuous integration process for software.
Construction Pipeline Staging and development environments are both served by a single pipeline. Since we are utilising gitflow, the branch that initiates the process—for example, branch develop for development and release for staging—controls which environment will be used for execution. The promotion task for Pull Requests is not carried out for development.
The following command copies the app repository from the gitea server, creates a new branch called develop, and pushes it to the origin, kicking off the pipeline for the develop environment according to the defined webhook.
git clone https://gitea-cicd.$cluster/gitea/devops-ocp-app.git
cd devops-ocp-app
git checkout -b develop
# User and password gitea/devops
git push -u origin develop
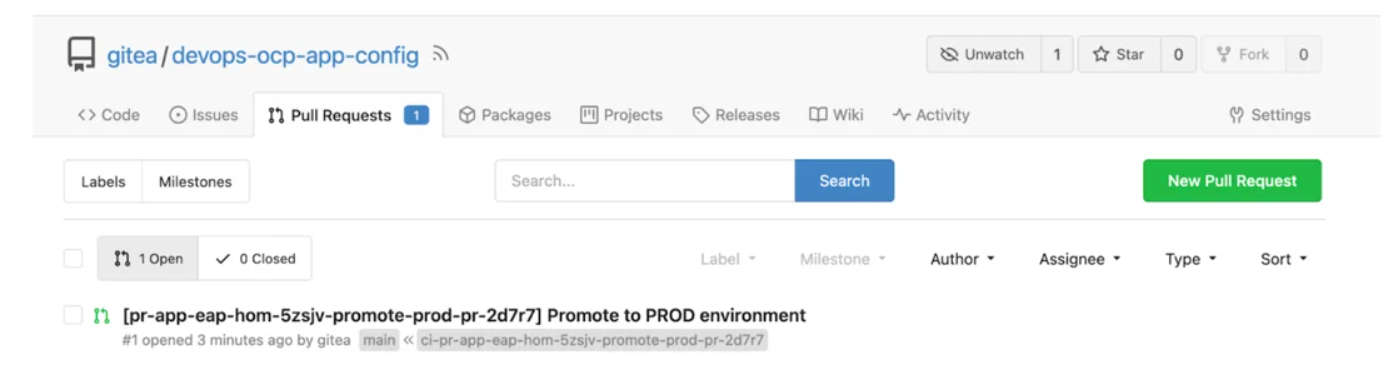
Pipeline Staging All tasks, including the promotion of the Pull Request to move the picture to the production environment, are completed for this environment.
git checkout -b release
git push -u origin release
Production Go to Gitea, open the configuration repository (devops-ocp-app-config), select the pull request tab, and approve the pull request produced by the staging pipeline to advance the application to the production environment. In this manner, ArgoCD will deploy in the production environment when carrying out the merge.
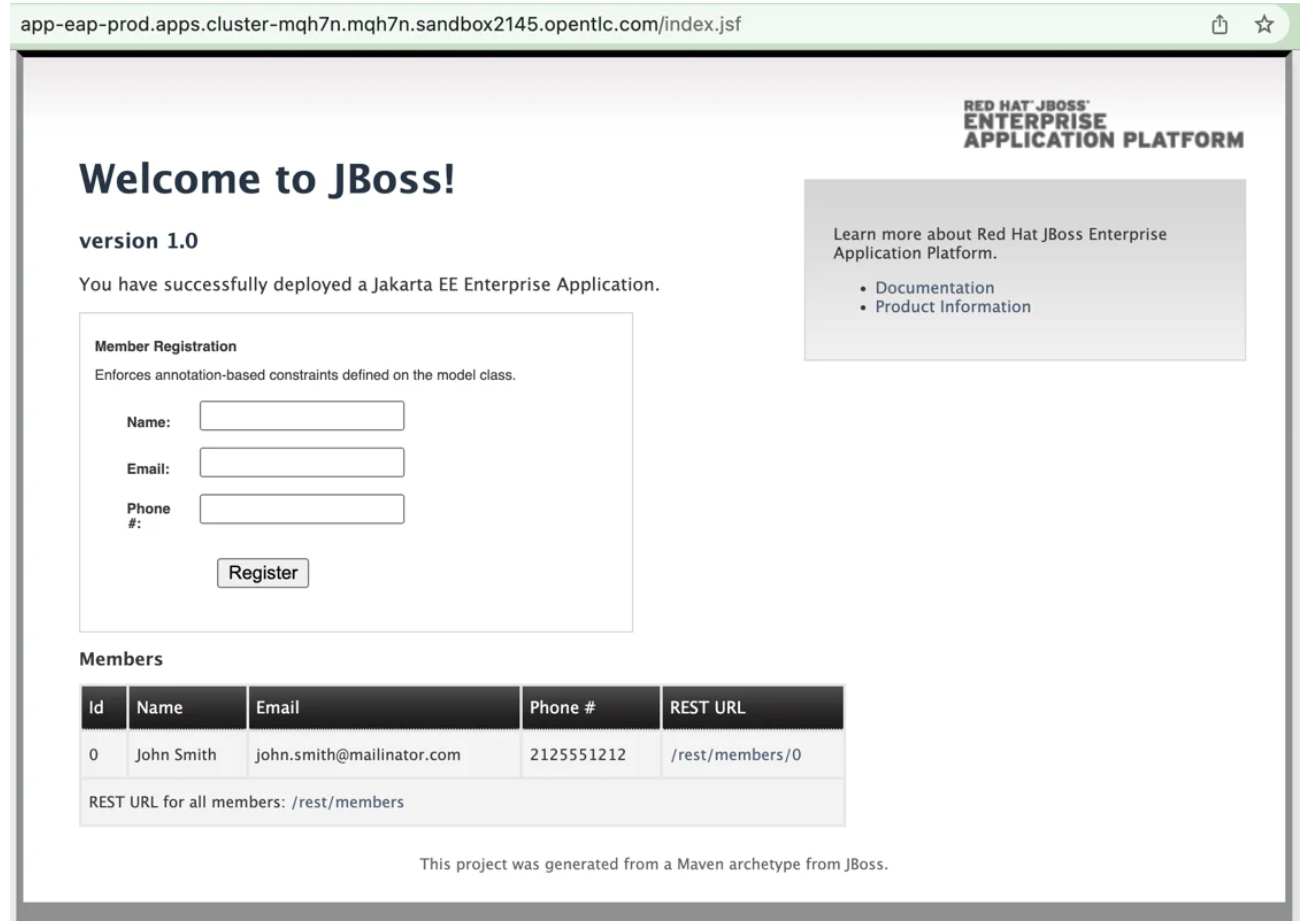
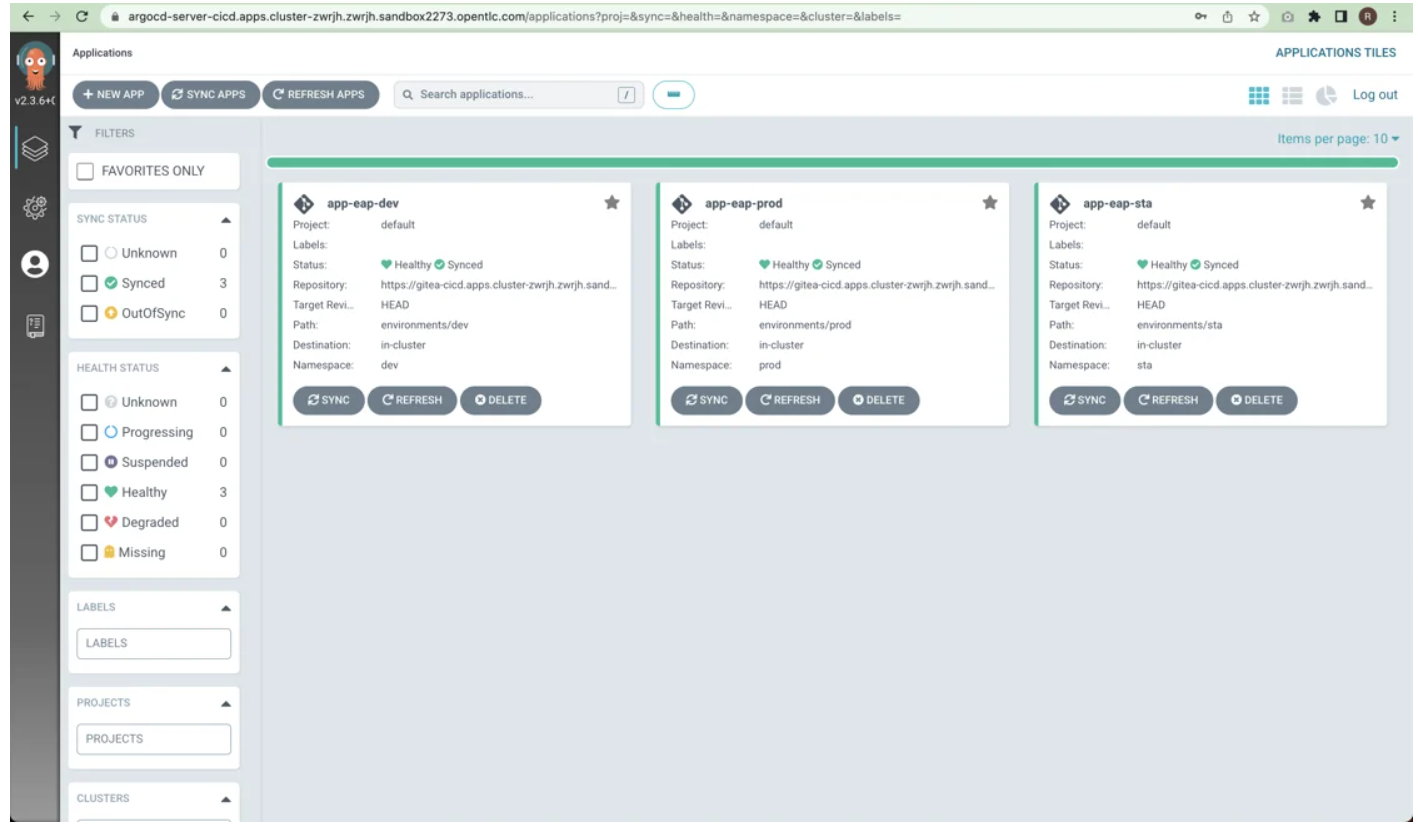
Running on the cluster is an application.
The ArgoCD applications.
Conclusion
With Cloud Native Pipeline and GitOps, this solution enables you to have a quick and easy DevOps environment. Since there are no techniques involved, it was essential to use examples, write scripts, run tests, and other related tasks. However, once developed, you have a model that is both repeatable and useful. That is how automation works. DevOps using Helm on OpenShift