Angular 2 Firebase Authentication
The Firebase platform is a perfect fit for your Angular 2 web or mobile application as it offers various useful backend services as real-time database, storage, notification, authentication etc.
In this tutorial you’ll learn how to make use of the Firebase authentication service in your Angular 2 application. We’ll start from scratch and develop a sample application step-by-step.
Authentication is a common task for most web and mobile application. By using the Firebase authentication service, authentication functionality can be easily integrated in your application. The Firebase service can be configured to make use of various authentication providers like Google, Facebook, Twitter or GitHub. By using those providers the user is able to use existing web accounts to sign in.
Let’s first take a look at the sample application we’re going to build in this tutorial.
What We’re Going To Build
The Angular 2 application we’re going to build in this tutorial makes use of the Firebase authentication service. The user will be able to sign in with an existing Google account. The first page the user sees is the login page:
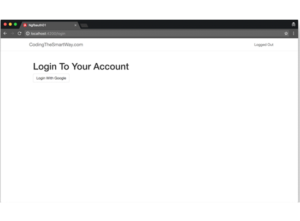
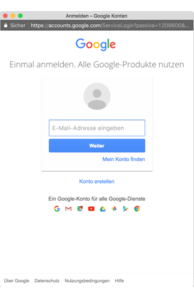
Clicking on the button “Login With Google” opens up the following pop-up window, so that the user is able to enter the credentials of an existing Google account or sign up for a new Google account.
After having signed in successfully the user is automatically redirected to the home page of the application:
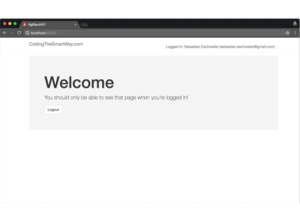
Trying to access the home page without being logged in takes the user to the login page.
Prerequisites
Before we can start to implement the application we need to prepare the development environment. As we’ll make use of Angular CLI to setup the initial project and generate various pieces of the project we need to install it first. Angular CLI is available as a NPM package, so that the installation can be done by using the npm command:
$ npm install -g @angular/cli
For AngularFire2 to work we will also need to install typings and typescript.
$ npm install -g typings
$ npm install -g typescript
Initiating A New Angular 2 Project
With Angular CLI installed on your system, it’s easy to setup a new Angular 2 project:
$ ng new ngfbauth
This command creates a new folder ngfbauth and downloads and installs the Angular 2 project template into that folder. After the command is completed you can change into that folder and start up the application:
$ cd ngfbauth
$ ng serve
Our app should now be visible from a browser on the default url http://localhost:4200.
Add Bootstrap
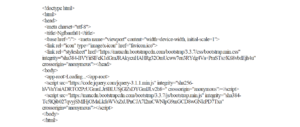
We’ll make use of the Bootstrap Framework to style the user interface of our application. To include Bootstrap in the Angular 2 project the easiest way is to add the corresponding files to index.html and use a link to a CDN:
Firebase Setup
Create a New Firebase Project
In order to be able to make use of the Firebase authentication service, we need to set up a new Firebase project first. This step is done in the Firebase backend which is called Firebase console and available at https//console.firebase.google.com.
You first need to create a Firebase account, so that you’re able to login to the console. After having logged in you’ll be able to see the following screen:
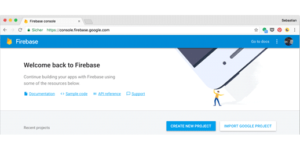
Click on button “Create New Project” to create a new firebase project. The following pop-up window opens. Here you can specify the project name and the country / region in which the project should be hosted:
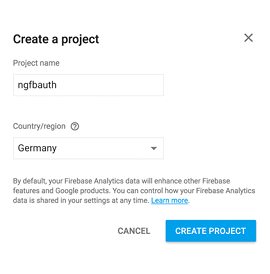
Click on button “Create Project” to initiate the creation process. Once the project is ready you’ll be forwarded to the project’s overview page in the Firebase console:
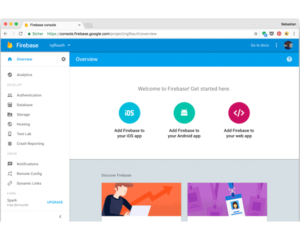
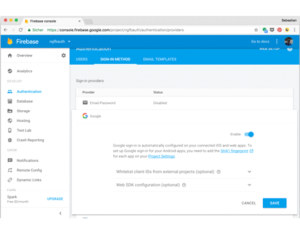
In the left-side menu structure you’ll find the link “Authentication”. If you click on this link you’ll be taken to the configuration page of the Firebase authentication service. Switch to the tab “Sign-In Method”. Here you’ll find a list of all sign-in providers supported by the Firebase authentication service:
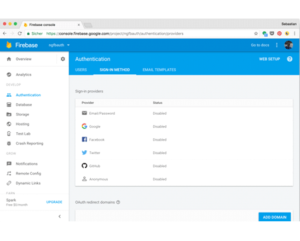 By default all of the providers are disabled. In the following example we would like to use Google authentication in our Angular 2 application, so we need to enable the Google authentication provider in this view:
 Install AngularFire2
AngularFire2 is the official Firebase library for Angular 2. The project website can be found at https://angularfire2.com. As we would like to use AngularFire2 to make use of the Firebase authentication service in our Angular 2 project we need to intall that library first:
$ npm install firebase angularfire2 –save
Running this command makes sure that both libraries – the Firebase core library and the AngularFire2 library – are added as dependencies to package.json and are downloaded to the node_modules folder.
Add Firebase Configuration to AppModule
In the next step we need to include the AngularFire library in our project. We do that in app.module.ts by first adding an import statement for AngularFireModule and then adding AngularFireModule to the array which is assigned to the imports property of the @NgModule decorator:
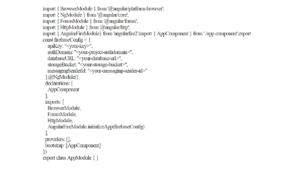 Note, that we’re adding the AngularFireModule to our application by calling the factory method initializeApp and passing in a configuration object. This firebase configuration object consists of a set of properties (apiKey, authDomain, databaseUrl, storageBicket, massagingSenderId). These settings are specific to the Firebase project and can be retrieved from the Firebase console.
Implement An Authorization Service
In order to use the Firebase authentication service within our application it’s a good idea to create an Angular 2 service which encapsulates the code which is needed to deal with that service. Let’s create a new service by using Angular CLI again:
$ ng generate service providers/auth.service.ts
The following two files are added to the project structure:
• src/app/providers/auth.service.ts
• src/app/providers/auth.service.spec.ts
As we’re not focusing on setting up test cases, we’re not going to use file auth.service.spec.ts in this tutorial. The service implementation is done in file auth.service.ts:
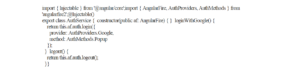
We need to import AngularFire, AuthProviders and AuthMethods from the AngularFire2 library first. Next, the AngularFire service is injected into the constructor of the service. By using the public keyword we’re making sure that a public class member is created at the same time, so that the service instance is accesible from inside and outside of the service class.
The implementation of the AuthService class consists of two methods:
• loginWithGoogle()
• logout()
The loginWithGoogle() method is used to call the login() method of the auth object of the AngularFire instance. This login methods expects to get an configuration object which describes which authentication provider and which authentication method should be used. As we would like to use Google authentication the value AuthProviders.Google needs to be assigned to the provider property. When invoking the authentication process we would also like to display a pop-up window for signing in to the user. To achieve this application behaviour we need to assign the value AuthMethods.Popup to the method property.
The logout service method only consists of one line of code. We’re calling the method logout of the auth object of the AngularFire object to make sure that the user is logged out.
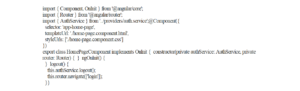
Now we now need to add our provider to app.module.ts as well. This is done by adding another import statement:
![]()
Furthermore we need to add the providers property to the @NgModule decorator:
providers: [AuthService]
The providers property expects to get an array assigned. This array contains all service providers which should be made available. In our case this array contains one element: AuthService.
Implement LoginPage Component
Next let’s add a login page to our application. We do that by generating a new component by using the following command:
$ ng generate component loginPage
This command create a new folder src/app/login-page and in that new folder you’ll find the following new files:
• login-page.component.ts
• login-page.component.css
• login-page.component.html
• login-page.component.spec.ts
Note, when we’re using Angular 2 CLI to generate a new component, that component is automatically added to AppModule.
We’re using some Bootstrap CSS classes to style the page elements and we’re including a button. Clicking on that button calls the logout() method which is implemented in class HomePageComponent in file home-page.component.ts:
Implementing Routing
The application router is configured in file app.module.ts:
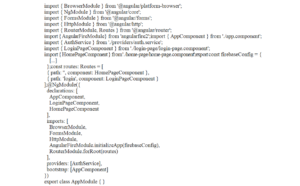 The routes array consists of two Routes objects, one that connects the default route (/) with component HomePageComponent and one that connects route /login with LoginPageComponent.
This router configuration is activated by passing the configuration object to the factory method Router.Module.forRoot() and adding the returned RouterModule to the imports array.
In app.component.ts we’re now able to insert the code into the constructor which is needed to respond to the authentication status. The auth object of the AngularFire instance returns an Observable, so that we can use the subscribe method to respond to changes of the authentication status:
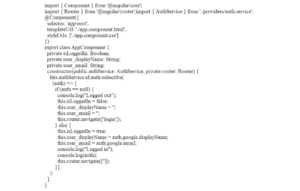 We are defining the following three class members which are set each time the authentication status changes:
• isLoggedIn: If logged in, isLoggedIn is set to true, if not to false.
• user_displayName: If logged in this class member is set to the display name of the user account.
• user_email: If logged in this class member is set to the email address of the user account.
Furthermore we’re using the Router service to redirect the user each time the authentication status changes:
• If authentication information is available the user is redirected to the default route, so that the output of HomePageComponent is shown.
• If no authentication information is available the user is redirected to the login route, so that the output of LoginPageComponent is shown.
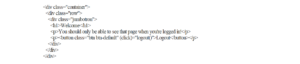
Now those three variables can be used in the corresponding template code as well:

The template contains a Bootstrap navigation bar. Within the navigation bar the template contains code to print out the authentication status.