")
Deploying JBoss EAP for Red Hat OpenShift Service on AWS (ROSA)
This blog explains how to Deploy JBoss EAP for Red Hat OpenShift Service on AWS (ROSA) environment. Let’s get into it!
A collaborative venture between Redhat and AWS called Redhat Openshift Service on AWS (ROSA) offers businesses a managed solution to run Openshift. This allows the development teams to concentrate on innovation while building, deploying, and scaling apps quickly. Visit the ROSA homepage and ROSA on the AWS marketplace to learn more.
Prerequisite
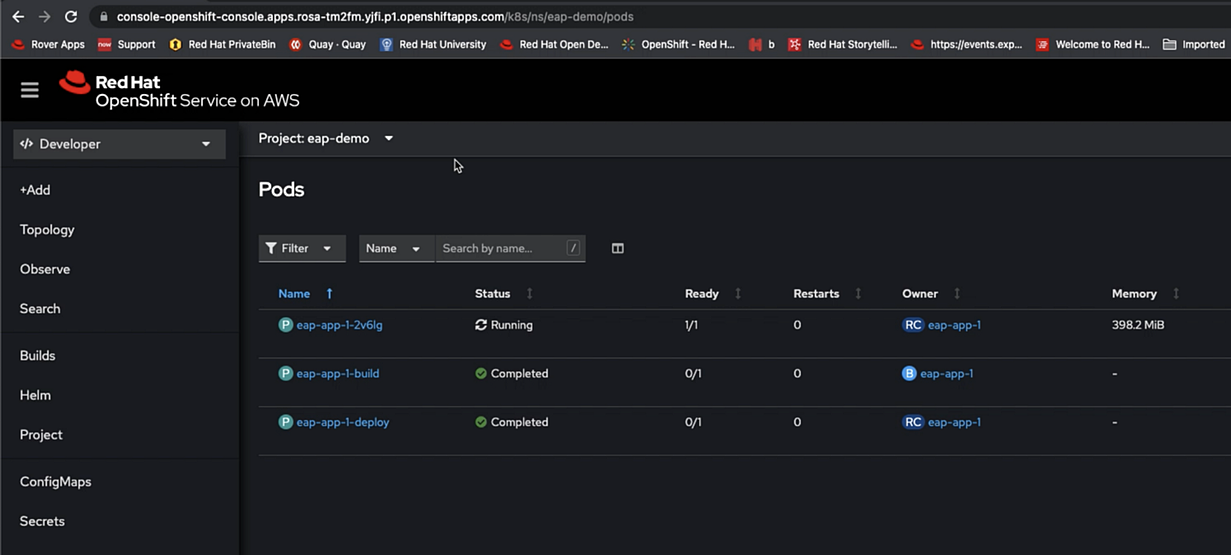
You will have access to the Redhat OpenShift console once you have provisioned the ROSA cluster through the AWS Management Console; it will resemble the screenshot below.
Connect to and set up the environment for OpenShift
1. Use the “oc login” command to log in to OpenShift from a terminal.
2. For the demo, create a new project or namespace.
$ oc new-project eap-demo
3. Make a secret out of the Keystore file for any features that require HTTPS.
To create a Keystore, use the keytool command with the following command.
$ keytool -genkey -keyalg RSA -alias eapdemo-selfsigned -keystore keystore.jks -validity 360 -keysize 2048
4. With the Keystore file mentioned above, create an OpenShift secret.
Red Hat Container Registry verification
We must set up authentication to the Red Hat Container Registry in order to use JBoss EAP for OpenShift images.
1. One set up your access and create a yaml file pull secret, click this link.
2. Choose the “OpenShift Secret” tab when you arrive at the Token Details screen since we need to pull the container images for our OpenShift namespace.
3. The yaml file will be in the “serviceaccount>>-secret.yaml” format; download it.
4, Using the file mentioned above, create the Auth token secret.
$ oc create -f <<1234567_serviceaccount>>-secret.yaml
5. The aforementioned command will create a secret; let’s link it for pull.
$ oc secrets link default <<1234567-serviceaccount>>-pull-secret — for=pull
$ oc secrets link builder <<1234567-serviceaccount>>-pull-secret — from=pull
Download the most recent JBoss EAP OpenShift image streams and templates.
1. The JBoss EAP Image resources are now prepared for import into your OpenShift namespace, or if you are a cluster administrator, you can select to import into all of your OpenShift Projects.
2. Run the script below in your terminal now.
for resource in \
 eap72-image-stream.json \
 eap72-amq-persistent-s2i.json \
 eap72-amq-s2i.json \
 eap72-basic-s2i.json \
 eap72-https-s2i.json \
 eap72-mongodb-persistent-s2i.json \
 eap72-mongodb-s2i.json \
 eap72-mysql-persistent-s2i.json \
 eap72-mysql-s2i.json \
 eap72-postgresql-persistent-s2i.json \
 eap72-postgresql-s2i.json \
 eap72-third-party-db-s2i.json \
 eap72-tx-recovery-s2i.json \
 eap72-sso-s2i.json
do
 oc replace — force -f \
https://raw.githubusercontent.com/jboss-container-images/jboss-eap-7-openshift-image/eap72/templates/${resource}
done
3. Replace the aforementioned command in the script above with the one below to import photos across projects.
  $ oc replace ……
……
oc replace -n openshift — force -f \
……….
JBoss EAP application (s2I) deployment to OpenShift
Now is the moment to launch the kitchensink app from this GitHub repository.
1. Execute the oc command listed below from your terminal.
$ oc new-app — template=eap72-basic-s2i \
-p IMAGE_STREAM_NAMESPACE=eap-demo \
-p SOURCE_REPOSITORY_URL=https://github.com/jboss-developer/jboss-eap-quickstarts \
-p SOURCE_REPOSITORY_REF=openshift \
-p CONTEXT_DIR=kitchensink
2. At this point, the Build pod should be operating and producing the final S2I image, as seen in the OpenShift console. Logs can be followed from the terminal as well.
$ oc get bc -o name
3. As indicated below, the Build and Deploy pods should be complete, and the container should be operating.
4. Provide the Build config name from the preceding step.
$ oc logs -f buildconfig/BUILD_CONFIG_NAME
Check Service and Route
1. Verify the application’s service that was built.
$ oc get service
2. If a route hasn’t already been disclosed by templates, expose it now.
$ oc expose service/SERVICE_NAME — port=8080
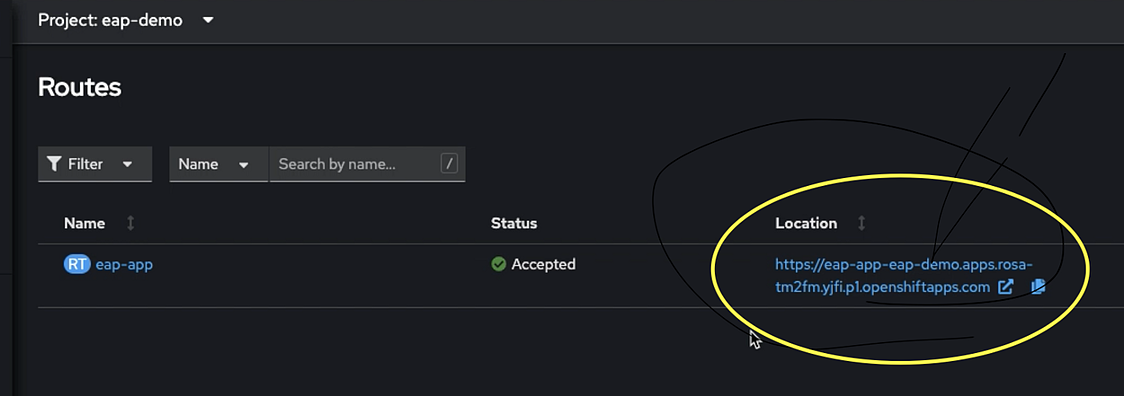
Access the deployed application
Navigate to Projects -> Routes in the OpenShift console and click the URL.
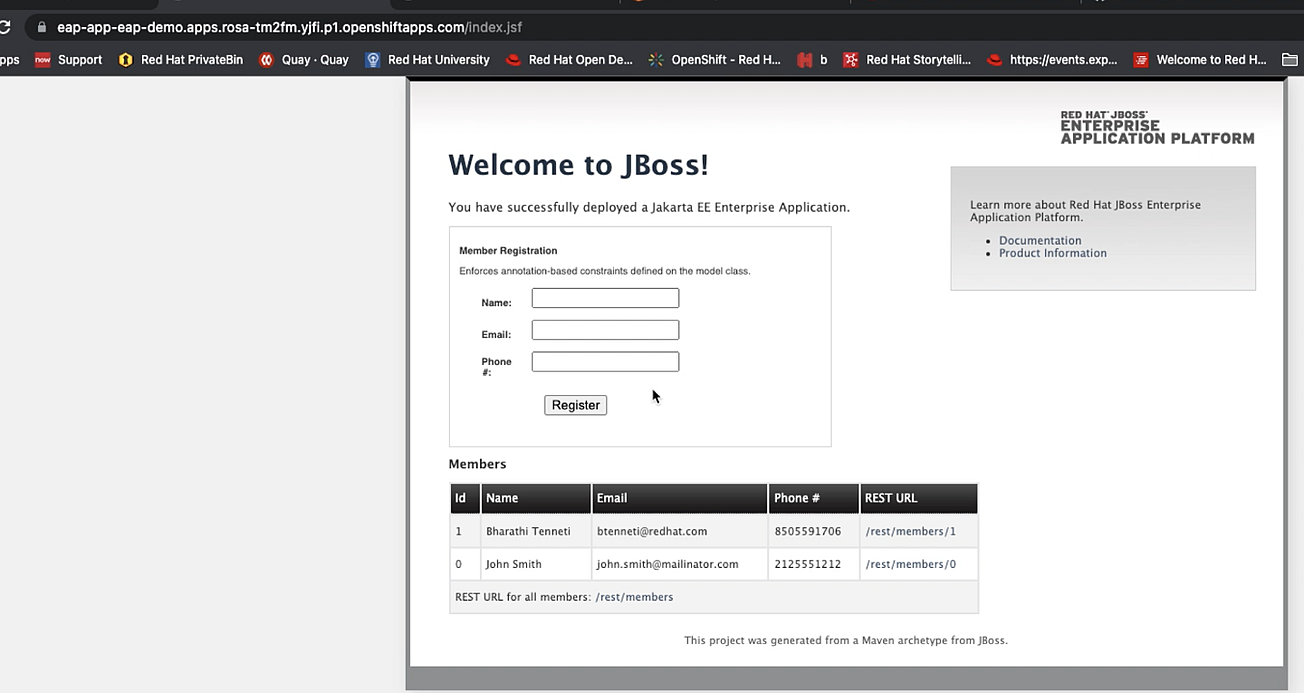
To test the app out, feel free to access the /rest/members REST API and play around with the deployed app.
Conclusion
This article should help you get up and running quickly with the deployment of JBoss EAP using OpenShift container templates on the managed cloud service Red Hat OpenShift Service on Amazon (ROSA).