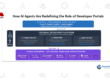
Mendix Operator Deployment, Installation and Configuration on Red Hat OpenShift
Here in this blog, we can learn how Mendix operator deployment, installation and configure on Red Hat OpenShift
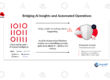
Mendix has been recognized by Red Hat as an official Red Hat Partner within the OpenShift ecosystem as of last month. This is a commitment to Red Hat and Mendix’s combined innovation in cloud-native architecture, multi-cloud capabilities, and positioning as a cutting-edge leader in the low-code market.
The cloud-native stateless runtime architecture of the Mendix platform, which supports contemporary cloud platforms like Docker, Kubernetes, and Cloud Foundry, complies with the Twelve-Factor App principles. In this way, Mendix apps benefit from pre-built CI/CD, auto-scaling, auto-provisioning, auto-healing, reduced infrastructure overhead, and cloud compatibility. Mendix can be set up on a wide range of platforms, including traditional (virtual) servers, virtual private clouds, private clouds, hybrid clouds, and multiple clouds.
In Red Hat OpenShift Running and Deploying Mendix
One-click deployment is used to bundle and deliver Mendix apps to Red Hat OpenShift. Before deploying it to the staging area, this functionality automatically creates the necessary deployment package with all the relevant components. Additionally, Mendix facilitates the production of build packs for on-site and infrastructure-as-a-service (IaaS) deployment.
Standalone and Connected Clusters
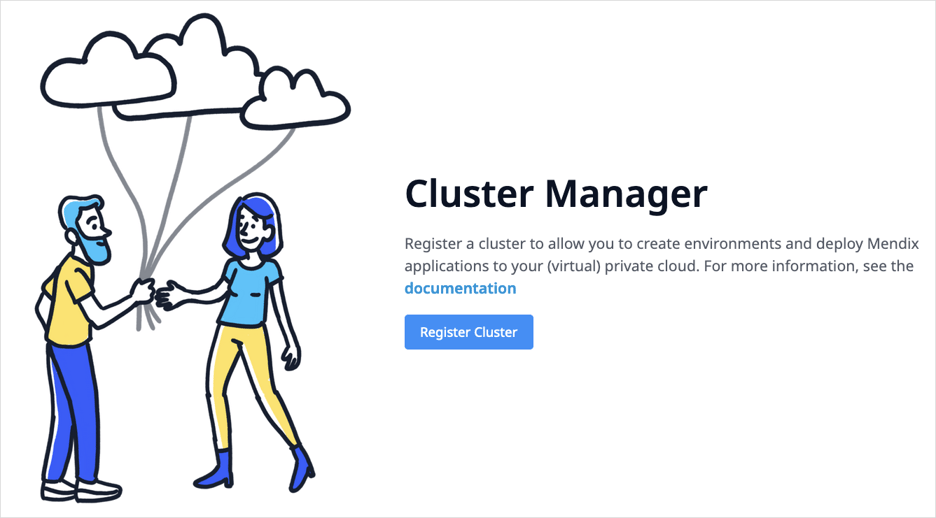
You must first register a cluster in the Mendix Developer Portal before you can manage the deployment of your apps to Red Hat OpenShift and Kubernetes and deploy apps to your private cloud cluster. As a result, a connection is made between the cluster and the Mendix Developer Portal. You will have the knowledge necessary to set up the Mendix Operator in your cluster. The Mendix Gateway Agent will also be launched if you select a connected cluster. You can use the Mendix Operator to set up the resources that your apps will use once it has been deployed to your cluster.
Depending on whether you decided to construct a connected cluster or a standalone cluster, you next have two choices.
Connected Clusters
The Mendix Gateway Agent will establish a link to the Environments pages of your Mendix app through the Interactor if you opt to register a connected cluster. The Mendix Gateway Agent operating on the cluster opens this secure bidirectional communication channel.
Any Mendix user with the appropriate authority can communicate with the Mendix Operator over this channel to transmit commands and get cluster status updates. This provides the directions required to configure the environment or deploy an app.
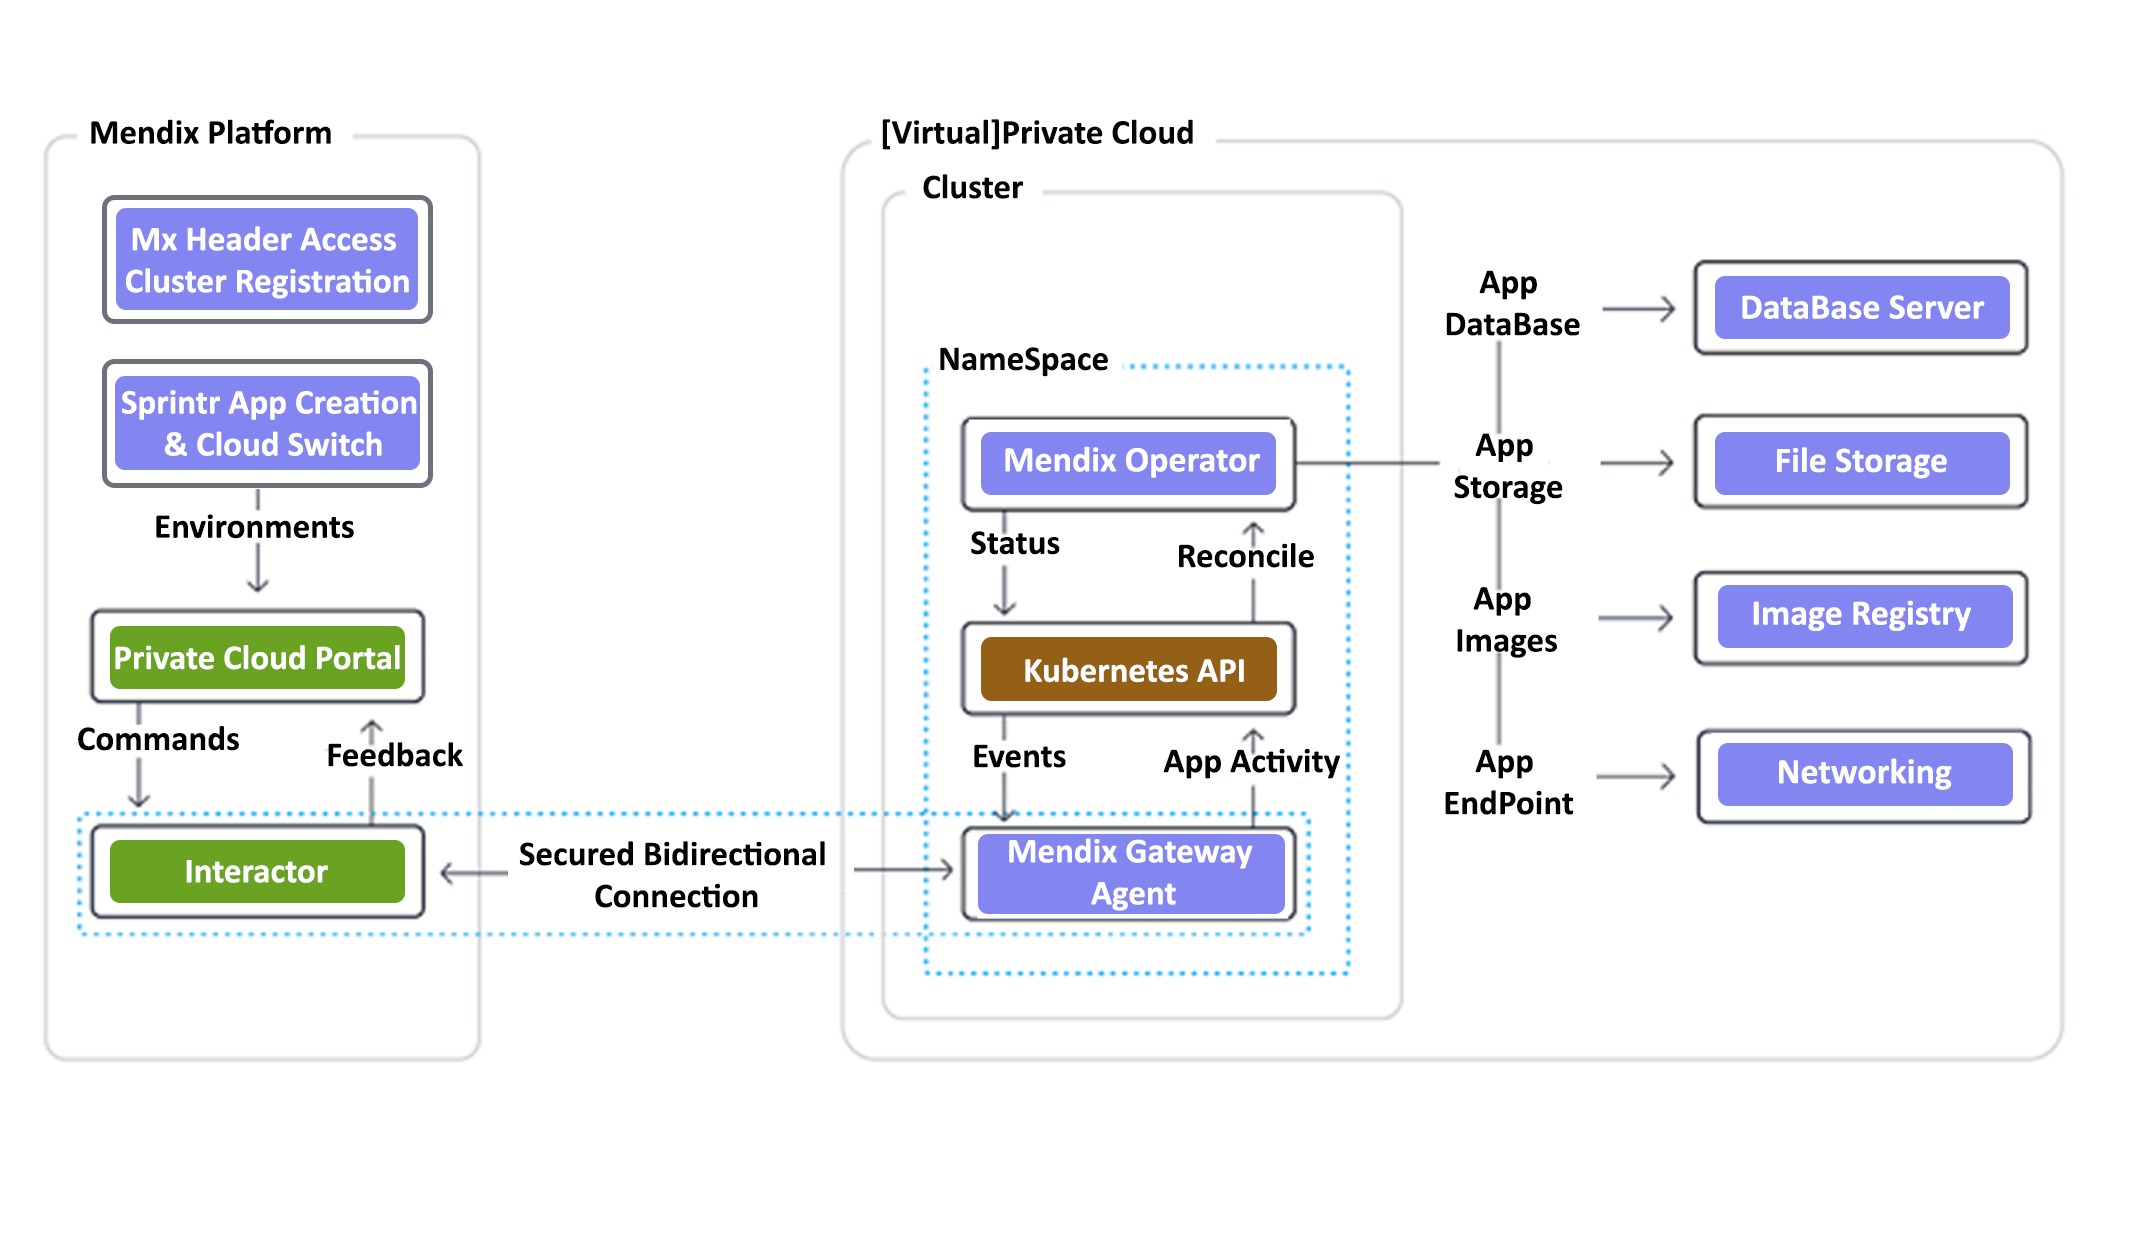
Standalone Clusters
All communication with the Mendix Operator will occur through requests sent directly through the Kubernetes API if you have chosen to register a standalone cluster. Although they can be created manually, your CI/CD pipeline usually handles this. To ensure that the deployment process can find the Mendix app deployment packages, you must also have local source control.
Conditions for Developing a Cluster
You’ll need the following to set up a cluster in your OpenShift environment:
- A Kubernetes platform with a version between 1.13 and 1.20, or OpenShift with a version 3.11 or higher (version 4.4 and higher is advised).
- A platform administrator account for OpenShift or Kubernetes
- Installed the OpenShift CLI (see CLI Getting Started) if you’re using OpenShift to create clusters
- If you are deploying to another Kubernetes platform, you must have Kubectl installed (Install and Set Up Kubectl).
- A command-line interface that accepts mouse input and supports the console API. This might be done using Windows Command Prompt or PowerShell. For additional information, see Terminal limits.
Environments in Connection
The following URLs must be safely listed in your cluster’s operating system if you plan to use a connected environment because they refer to services or resources needed by the connected environment’s infrastructure.
| URL | Description |
| https://interactor-bridge.private-cloud.api.mendix.com | Websocket based main communication API |
| https://mx-package-store.home.mendix.com/ | Registry for downloading MDA artifacts |
| https://private-cloud.registry.mendix.com | Docker registry for downloading Runtime base images |
| https://subscription-api.mendix.com | Service to verify the call-home license |
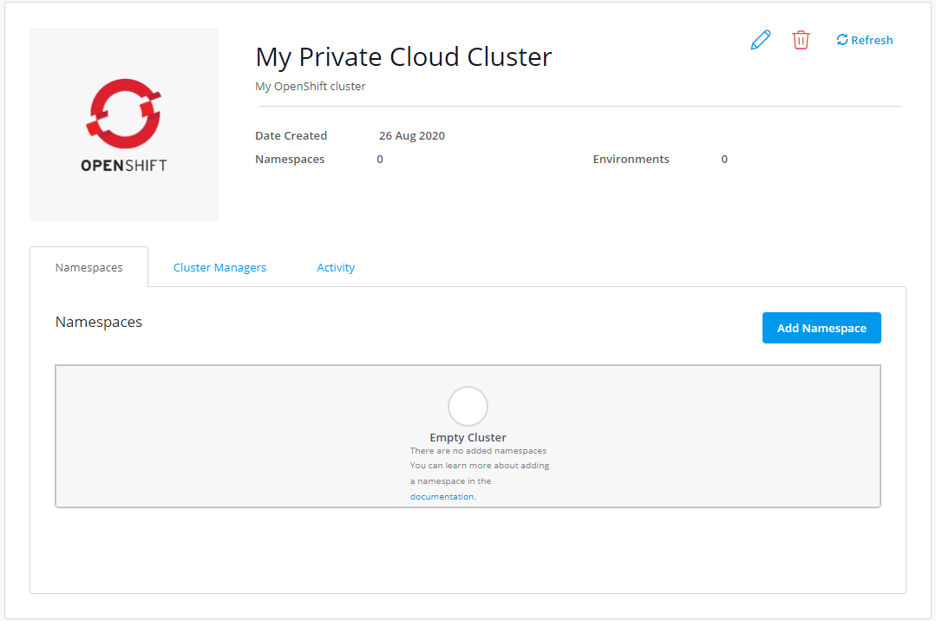
Cluster and Namespace Creation
Establishing a Cluster
- On the Mendix app’s General Settings tab, choose Cloud Settings.
- For private cloud, click Mendix.
3. Click Mendix for Private Cloud Setup to begin.

4. Select Cloud from the Switch menu by opening it.
5. From the Developer Portal’s top menu bar, choose Cluster Manager.

6. Register Cluster by clicking.
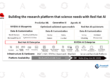
7. Please enter the following details:
Name: You should give the cluster you are building a name.
Type: Select the appropriate kind for your cluster from the list. For further details, see Supported Providers.
Description: In the cluster manager, a cluster’s optional description will be shown next to its name.
8. Press Create.

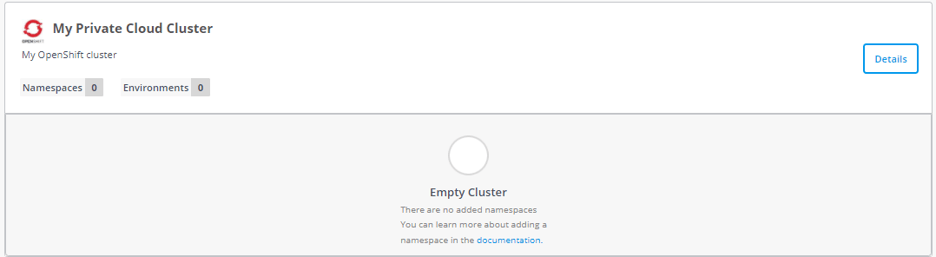
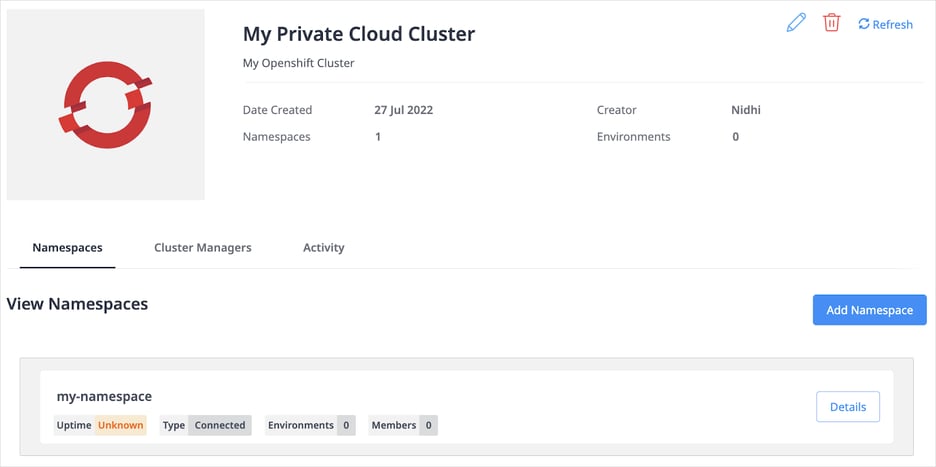
A Namespace is Added
A namespace must now be added to your cluster. There may be numerous namespaces in your cluster.
Adding a namespace entails the action of:
- Choosing Details
2. Then select Add Namespace.
3. Type the following information in:
Namespace: refers to your platform’s namespace. This needs to follow the cluster’s namespace naming guidelines: the name may contain hyphens and only lowercase letters.
Installation type: Select Connected if you want to establish environments and deploy your app through the Mendix Developer Portal. Select Standalone if you only want to manage your deployments through the Mendix Operator’s CLI. After making your selection.
4. click Done to create the namespace.
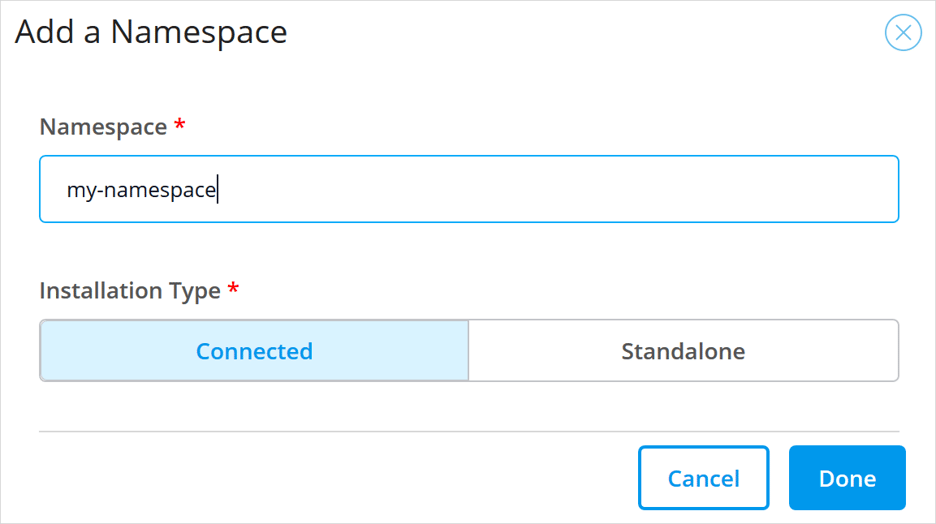
Please ensure the Connected Environment Prerequisites are configured if you have chosen a Connected Installation Type.
Putting in place and setting up the Mendix Operator
Installing the Mendix Operator and setting up the services your app will utilize are prerequisites for using it in your namespace. You are given a Configuration Tool by Mendix that directs you through the procedure.
Take the Configuration tool download
Follow these steps to access the installation tab for your namespace if you aren’t already there:
- Click Cluster Manager in the top menu of the Developer Portal’s Clouds page to access the Cluster Manager page.

2. Next to the namespace you want to utilize, click Details.
3. Select the tab for installation.
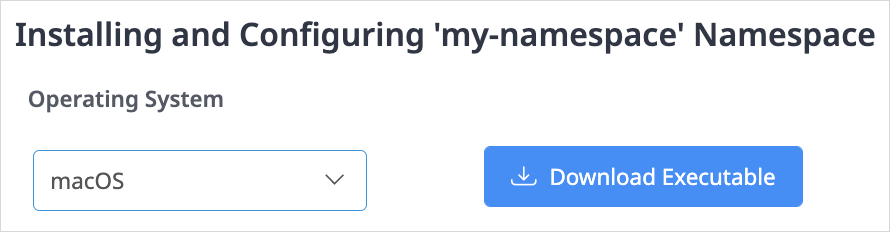
You can now perform the following to obtain the Configuration Tool:
- The operating system for your local machine should be chosen.
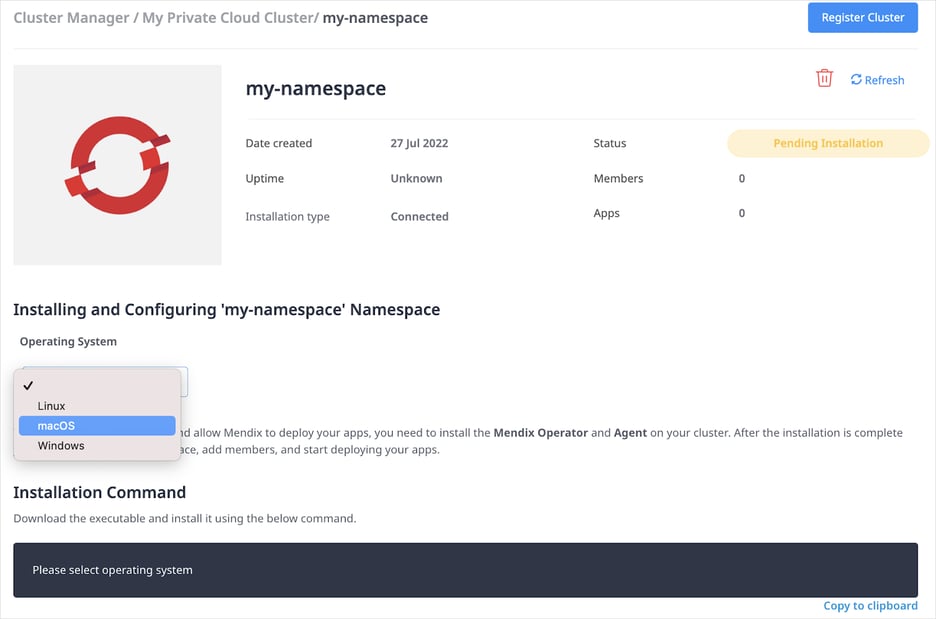
2. Click Download Executable
3. The Mendix Operator Version that you want to install can be chosen. Your current installed version of the Mendix Operator will be marked if you’ve already installed it.
Version 2.. of Mendix Operator is compatible with Kubernetes versions 1.19 and later. Version 1.12.* of Mendix Operator is compatible with Kubernetes versions 1.12 through 1.21. Select the most recent version that your Kubernetes cluster supports.
Versions older than 1.9.0 are only available to configure Mendix Operator versions that have already been installed.
You shouldn’t install older versions of the Mendix Operator into the same cluster, including additional namespaces, once a specific version of the Mendix
Operator has been installed into any namespace in the cluster.
Only a small number of Mendix Operator versions are supported by the installation and configuration tool. The setup tool cannot configure a Mendix Operator version that is either too new or too old for your namespace. Download a configuration tool version that works with the Mendix Operator you have set up. You can download the mxpc-cli tool in both ARM and AMD versions.
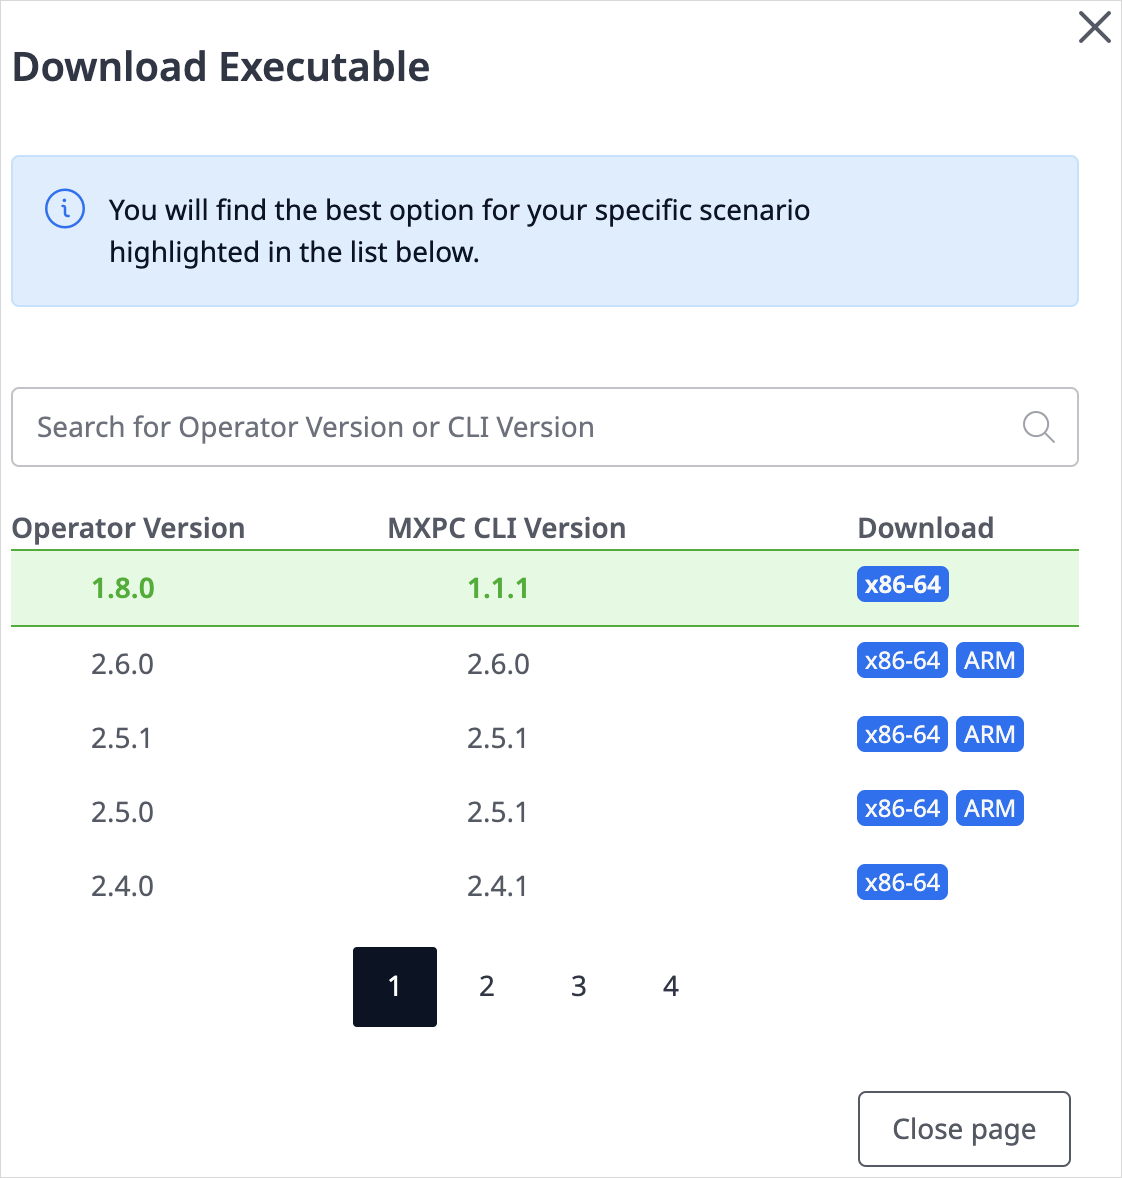
4. To get the installation and configuration utility, click the download icon. Make sure it is placed on your path someplace.
Loggings into the formula
To access your private cloud platform, you must have administrator rights. This implies that logging in is required before using the Configuration Tool.
The following steps can help you achieve this:
- Activate your OpenShift Console account.
- In the user drop-down menu, select Copy Login Command.
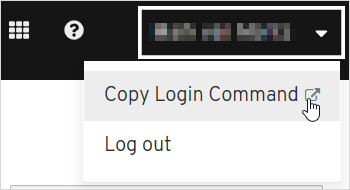
3. Select an identity provider (IdP).

4. To display a token, click.
5. Under Log in with this token, copy the command.
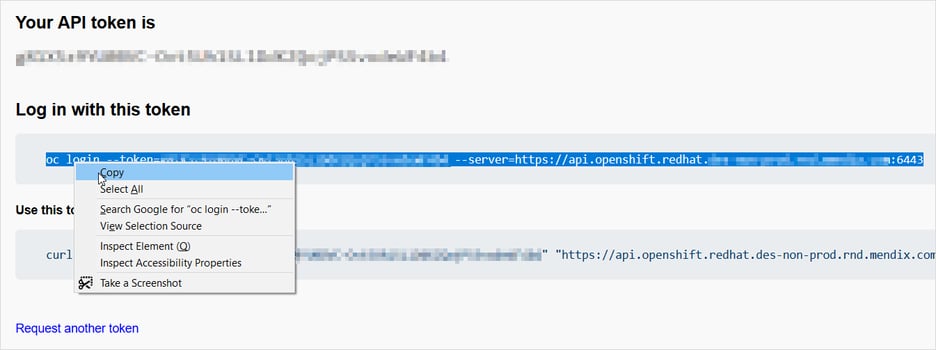
6. Enter the command after pasting it into your command line terminal.
Configuration Tool Operating
Run the Configuration Tool after signing in to your cluster.
Please refer to Install and Configure Mendix for Private Cloud Non-interactive Mode for instructions on non-interactive installation.
- By selecting Copy to clipboard, you can copy the Installation Command.

2. Enter the command after pasting it into your command line terminal.
A CLI terminal that supports a mouse is required by the Configuration Tool. Before using the Configuration Tool, read the section describing the terminal constraints.
The configuration options will be displayed on the screen, and you will receive instructions on how to enter the necessary data.
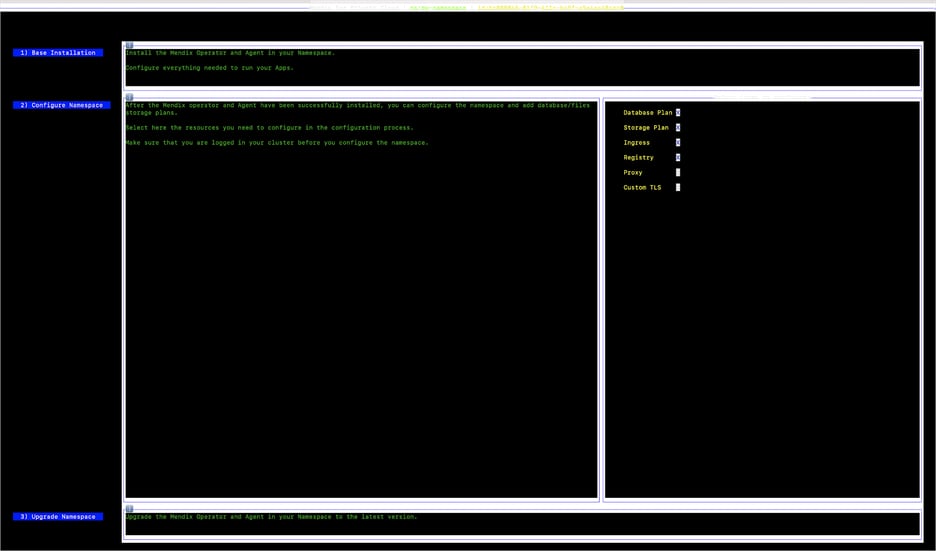
Installation at Base
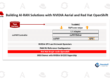
You must install the Mendix Operator and Mendix Gateway Agent if they are not already present in your cluster.
- On Base Installation, click.
- Choose whether the cluster should be connected or stand-alone.
See Connected and Standalone Clusters in the Private Cloud documentation for more details. - Choose between the OpenShift and generic cluster types as needed.
- To install the Mendix Operator and Mendix Gateway Agent in your cluster, click Run Installer. You’ll see the display shown below.
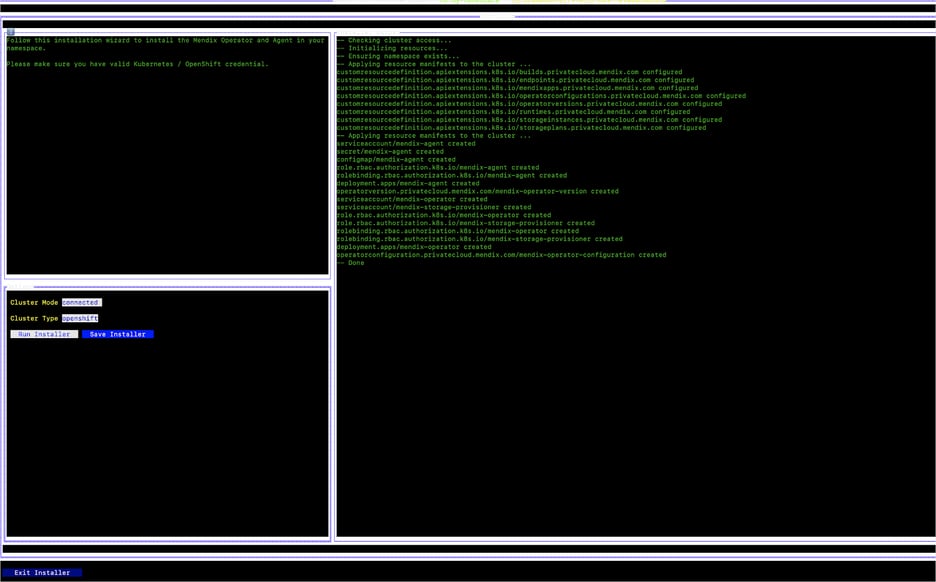
5. If you want to preserve these settings for later use, click Preserve Installer.
6. To complete, click Exit Installer.
Your platform now has the Mendix operator and Mendix Gateway Agent installed.
Please take note of the following if you chose the Connected Mode, which installs the Mendix Gateway Agent component:
- The Mendix Gateway Agent from the cluster initiates all WebSocket connections (to communicate with the Mendix Platform), and these connections don’t need any listening ports to be opened in the firewall of the cluster. The only thing that has to be done is safelist the URL https://interactor-bridge.private-cloud.api.mendix.com to establish an outbound connection from the cluster to the Portal.
- Since every WebSocket connection is made via HTTPS, it is possible to route it through a proxy server.
Afterword
For your own Kubernetes-based (virtual) private cloud, Mendix For Private Cloud provides Mendix’s “LowOps” one-click deployment experience, enabling development teams to manage the application lifecycle over the application data in a private cloud setting. It is entirely containerized, offers ongoing vulnerability checks, and collaborative assistance, and is certified on Red Hat Openshift. The joint venture between Red Hat and Mendix affirms our dedication to continuing to offer customers a world-class, secure, and verified experience with cloud-native architecture and the larger multi-cloud landscape.